Mesh
总览
本示例主要介绍如何使用ble mesh。
Node 使用步骤
下载 Bouffalo Lab BLE mesh apk (目前仅支持安卓系统)并安装;
进入
customer_app/bl602_demo_event工程或者customer_app/bl702_demo_event工程;通过命令genblemeshmodel编译,成功后下载BIN文件;在串口中运行Mesh相关命令:
- BL602:
#stack_ble
#blemesh_init
#blemesh_pb 2 1
- BL702:
#blemesh_init
#blemesh_pb 2 1

- 打开App,Network栏中选择点击添加

- 在扫描界面中,选择要添加的设备

- 在界面中点击IDENTIFY选项

- 在界面中点击PROVISION选项

- 在弹出的界面中选择No OOB,点击ok

- 在弹出的界面中,点击ok

- 界面自动调到Network栏中,点击已经连成功的设备

- 在界面中选择Elements选项,点击其下拉按钮

- 在界面中选择Generic on off Server选项

- 在界面中选择BIND KEY选项

- 界面中点击Application key 1

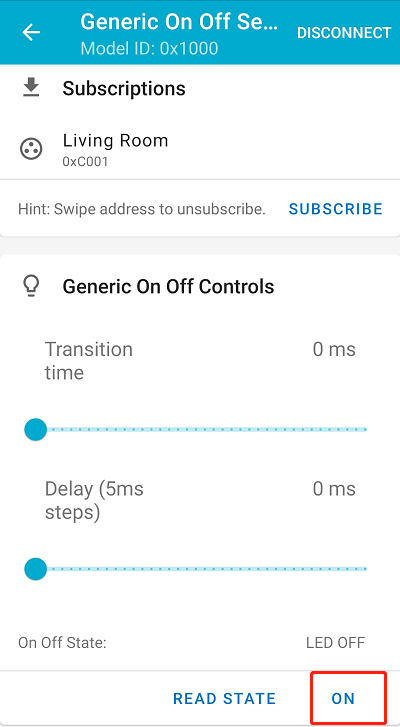
- 在界面中点击ONOFF选项,控制LED的开关

- 在串口中看到有如下信息表明控制LED成功

- 在界面中点击SUBSCRIBE选项,

- 在界面中选择Create a new group to subscribe选项,

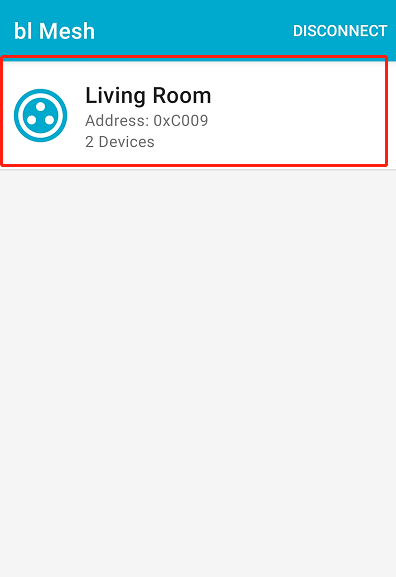
- 按照同样的方法添加另外一个设备的节点,添加成功后,在Groups选项中,点击已经成功创建的group

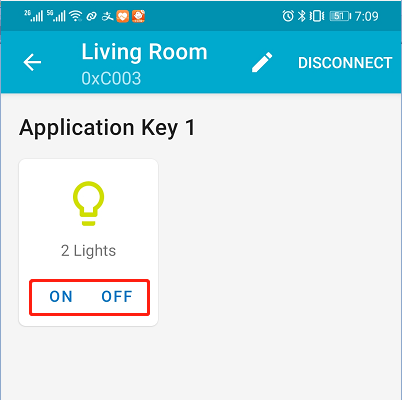
- 在group中,选择ON/OFF,并且串口中打印log提示LED开关信息,说明mesh组网成功


Provisioner 使用步骤
编译时需要开启 如下配置选项
CONFIG_BT_MESH_PROVISIONER=1
启动未入网节点, 进入等待入网状态。
- 1、初始化 BLE。
stack_ble
- 2、初始化 MESH。
blemesh_init
- 3、发送 PB-ADV Unproved beacon。
blemesh_pb 1 1
Provisioner 节点使用
- 1、启动Provisioner,添加未入网节点。
- 1.1、初始化 BLE。
stack_ble
- 1.2、初始化 MESH。
blemesh_pvnr_init
运行 log 如下:
# blemesh_pvnr_init
Local node provisioned, net_idx 0x0000 address 0x0001
Network key:8fe7deea92943001567251dc1f9b0f03
Dev key:89c2f18f9f286661c6bbb1430d7aadb7
Provisioning completed
- 1.3、开启未入网广播数据回调,和添加节点成功数回调,会打印出未入网设备的UUID信息。
blemesh_beacon_listen 0x01
- 1.4、加指定设备入网
blemesh_provision_adv 07af000011112222333318b905de96c2 0 3 0
P1:“07af000011112222333318b905de96c2" 为设备的UUID.
P2:0:net_idx
P3:3:指定入网设备的单播地址。
P4:0:attention_duration
设备入网成功之后会打印如下提示信息:
设备入网成功。
- 2、设置 node model server
- 2.1、获取 composition data.
blemesh_get_comp 0x0000 0x0003 0x00
P1:net index.
P2:dst address.
P3:page number.
- 2.2、添加appkey
blemesh_app_key_add 0x0000 0x0003 0x0000 0x0000
P1:net index.
P2:dst address.
P3:Network key index。
P4:Application key index.
- 2.3、绑定Generic onoff server model
blemesh_mod_app_bind 0x0000 0x0003 0x0003 0x0000 0x1000
P1:net index.
P2:dst address.
P3:element address.
P4:Application key index.
P5:Model ID.
- 3、Provisioner 使用 client 控制 node 的 server
- 3.1、注册回调函数
blemesh_gen_oo_cli reg
- 3.2、获取Generic onoff server status
blemesh_gen_oo_cli get 0x0000 0x8201 0x00 0x0003 0x0000
- 3.3、设置Generic onoff server
设置onoff状态为1
blemesh_gen_oo_cli set 0x0000 0x8202 0x00 0x0003 0x0000 0x00 0x01 0x00 0x00 0x00
设置onoff状态为0
blemesh_gen_oo_cli set 0x0000 0x8202 0x00 0x0003 0x0000 0x00 0x00 0x01 0x00 0x00
- 4、删除节点
blemesh_node_reset 0x0000 0x0003
- 5、Group subscription 操作。
添加: blemesh_mod_sub_add 0x0000 0x0003 0x0003 0xc000 0x1000
P1:net index.
P2:dst address.
P3:element address.
P4:subscription address.
P5:Model ID
删除:
blemesh_mod_sub_del 0x0000 0x0003 0x0003 0xc000 0x1000
P1:net index.
P2:dst address.
P3:element address.
P4:subscription address.
P5:Model ID
- 6、Vendor model 操作。
需要设置 CONFIG_BT_MESH_MODEL_VENDOR_CLI=1, 来开启 vendor cli model 的功能
- 6.1、Node 绑定 Vendor server model
blemesh_mod_app_bind 0x0000 0x0003 0x0003 0x0000 0x0002 0x07AF
P1:net index.
P2:dst address.
P3:element address.
P4:Application key index.
P5:Model ID. (0x0002) bouffalolab vendor model id.
P6: Company ID.(0x07AF) bouffalolab company id.
- 6.2、Provisioner 向 Node 发送数据
blemesh_vendor_cli 0x0000 0x0008 0x00 0x0003 0x0000 001234
P1:Application key index
P2:opcode
P3:msg_role (暂未使用)
P4:addr
P5:net index
P6:status